Showing posts with label Etsy. Show all posts

Monday, January 25, 2016

New Year. New Focus.

I'm gearing up for a restock of my Etsy shop, which I've neglected over the past year (!).  
Honestly, for me it's difficult to maintain my little Etsy shop while participating in various shows.  My hands can only stitch so much before they feel like they are going to fall out.  

This year I've decided concentrate on my Etsy shop and give it the attention it deserves.  

So much cute stuff to put out there--plus it will help me with my photography skills. =)  From making product to posting product, it's a huge undertaking and I'm ready....I think! 

Wednesday, April 23, 2014

Pincushion Love.


A cute little pincushion to hold all those cute little pins....I need to make more of these. =)

Happy Wednesday!

Friday, January 31, 2014

Hearts on a Garland? Yes Please.


Valentine's Day is right around the corner and everything is coming up hearts.  Now, I love crocheting hearts year round, but it gets kicked up a notch in the weeks leading up to Valentine's Day.  Rather than making a 3 ft or even 12 ft garland (I don't have the patience for that haha!), I went with a 12" mini garland.  This way, I could hang it on a message board or something similar without it getting in the way of, well, the messages.  

I started off crocheting a set of 6 hearts.  You can find my tutorial here.  I whipped up these little pretties during my lunch hour so once you get the hang of it, it doesn't take long at all.


I then measured out 12" of mint and white polka dot ribbon (Dear Lizzy via American Crafts) and lined up my hearts.


....and then I realized, "How am I going to connect these to the ribbon?"  Originally, I thought I would sew the hearts onto the ribbon, but being at work I didn't have my sewing machine (haha).  Instead, I kept the tails of the hearts and tied them up in a bow onto the ribbon.  I think it worked well. =)

Here is the final garland :)


Super easy and quick to whip up--my kind of craft!  

Happy crafting!


Sunday, October 13, 2013

Holiday Shopping? Yes Please =)

After a two week hiatus, Lovenote Crafts is now open for your holiday shopping pleasure! 
 Stop on by and peruse the goods!

Happy Crafting!

Thursday, September 26, 2013

Scrappy Scraps: A colorful mess.


What a beautiful messy pile of color, huh?  These scrappy scraps are the result of fabric tape making sessions.  After spending time selecting fabric, looking at color combos, and all that, it's hard to just throw them away.  So, I've kept them in a bag under my desk at home waiting to be used for some new project.

I tried making a scrap fabric garland and quickly realized that I suck at that.  My attempt at knot tying made my craft fail worst.  

So the other night, I was prepping product cards for Penelope Lane Boutique (Sept 28th in Seal Beach, CA--it's going to be fun!) and needed a cute and functional way to display my stuff.  I looked at the bag of scrappy strips and wallah!  Cute little product cards with a touch of personality.


I really liked the way these turned out.  It also gave me a way to hide the price tag--not too obvious but obvious enough if someone is looking for the price.  


So if you're looking for something more than baker's twin, jute, yarn, or ribbon to dress up your product cards, use your scrappy scraps and go wild.  It's worth it. =)

Happy Crafting!


Wednesday, September 18, 2013

What are you doing on September 28th? =)


Well, let me help you decide =)  How about some shopping at the Fall Penelope Lane Boutique?  Yes, it's going to be awesome.  Yes, it's going to be fun.  Yes, there's going to be so much handmade goodness that you're not going to know what to do with yourself.  

Check it out!  There will be 60+ vendors there (including your truly) who are dedicated to promoting the love of handmade.  Come one and come all.  It's going to be a blast.

I hope to see you there! =)

Happy Crafting!

Saturday, June 29, 2013

Pretty & Functional Adornments for Everyday

Pretty and functional: That's how I like to characterize what I create. My creative "bursts" are driven by the need for something to perform a specific task...and for it to be lovely at the same time! I love creating accessories and paper crafts that are functional and practical for everyday as well as fun and pretty to add that "special something" to an outfit, hairdo, or note to a friend. From adding a wool felt rose hair pin to your hair for your "office hairdo", wearing a brooch that doubles as a hair clip, using decoupaged clothespins to keep your mail in order, or hanging up your special photos with a floral photo garland kit, that "little bit of pretty" is sure to go a long way.

Lovely color combinations and texture assortments are inspired by fun times with my family and friends as well as moments that touch my heart. Because of this, there is a little bit of "me" and my everyday comings and goings in each piece I create. Whether it be a sweater clip to hold my cardigan in place because I am inspired by my sister's vintage style or cotton fabric tape with a whimsical design to add to sweet little love notes to my husband and children because we're so silly together, all are a reflection of my love for handmade and desire to share it with those who enrich my life.

With that, please check out new items at LoveNote Crafts.  All pretty, all functional, and all guaranteed to bring a smile to your face.  


Happy Crafting!


Friday, May 10, 2013

{excited} Craft Fair Fun & Shop Update


My Hubs' company hosted a craft fair yesterday to benefit Fosterlift, a local charity devoted to providing assistance to those amazingly wonderful foster parents who care for foster children.  With such a wonderful charity,  I was more than excited to participate in the craft fair and took a day off from work to do so. =)

I still consider myself a rookie craft fair vendor, but I feel that I gain confidence after each fair I do.  There's always something new to learn, something new to try no matter how many you may have done.  Plus, you meet new people along the way who also love to craft and understand your passion for handmade.

Though I had a month or so to prepare, that still didn't stop me from doing things last minute (boo).  From crocheting the last few flowers to packaging a more than a dozen items, I was up pretty late the night before. Unfortunately, I was not too pleased with my display.  I liked the individual parts of the display, but I felt the display as a whole didn't flow.  It was okay, but I wanted it to be GREAT.  That's the OCD in me, but I know there will be more opportunity to work on and build up this skill of marketing.  

~~~~~~~~~~~~~~~~

I used a french memory board to display these crochet blossoms.  {Find my tutorial here}  It worked pretty well as a display, but I think next time I want to fill it up with blooms so that it looks more like an art display. Not sure if that will work, but I think it would be pretty and even more eye catching.


~~~~~~~~~~~~~~~~

I used a bird bath type of jewelry holder to display my rose hair pins.  I love the bird bath, but I definitely will want to add more to it if I continue to use it at the next craft fair.


~~~~~~~~~~~~~~~~

These were my favorites to make--mini clothespin photo and note garlands.  Since the craft fair was sponsored by a company (vs. a craft organization or group), I thought marketing these as a way to "bring some character to your office work space" would be a great idea since many of the folks were just stepping out of their office buildings for lunch.  It worked! 


~~~~~~~~~~~~~~~~

And finally, my beloved and most favorite spring accessory--sweater clips {or collar guards}.  I really liked how I set up this display.  I had done up the display previously {see my tutorial here} but I attached mini clothespins last minute to hold the cards.  I used a lacey punch to add detail to the accessory card and wallah!  Super cute display.


I had a great time--met new people, had a convo with a fella who said my crochet blooms reminded him of "Penny Blossoms" (Big Bang Theory reference to all you bazinga fans out there--very appropriate comment coming from a programmer person), and simply enjoyed being outdoors.  

At the end of the day, I was also able to add more cute items to my Etsy shop, something I've been itching to do but haven't had a good uninterrupted 2 hours to do so.  But, I was finally able to do it and so here you go:


I really do appreciate all the support I receive from my family and friends (and from my super awesome customers).  Having this little creative part of my life to share with others really brings joy to my heart and quite simply, my entire being.  

I hope you find some room for Lovenotes in your day!

Happy Crafting!

Friday, April 12, 2013

♥ Spruce Up Your Spring ♥


Aren't these cute?! Not only are they fun to make especially in springy colors (see how to make the fabric ones), but it's also a good way to destash any of your extra scrap pieces of paper and fabric
too pretty to throw away or recycle.  

PLUS.....they're functional!  Cute and functional.  That's how I like my paper accessories. =)


These make me smile.  Really.  They do.  They just make my day to look at them at work, at home, in the kitchen....they'll even look adorable clipped on to a gift.  The possibilities are endless for these cuties.

Check them out in my shop and then {squeeeeee} with me =)

Happy Spring Crafting!


Monday, March 25, 2013

Springy Fabric Tape Clothespins


One of my favorite (and useful) things to make are fabric tape clothespins.  Because the clothespins come in different sizes, you can use them for a variety of things (hanging up photos, making them in to magnets, holding papers together, etc.).  Decorate them with different fabric designs and you can match the clothespins to pretty much anything.  See below for a super easy how-to!

~~~~~~~

Gather different sized clothespins, a pair of sharp scissors and strips of fabric tape.  (Check out my fabric tape tutorial for an easy way to make the tape.)


 Cut your fabric tape into smaller strips to fit your clothespins. (I used clothespins that are about
 1.75" x .25" and was able to fit 3 of them on a 1.75" wide piece of fabric tape.)


 Peel off the backing of the fabric tape and line up the edges of the clothespins to the edge of the tape (to minimize cutting).  Make sure to press down firmly on the clothespins to make sure the 
tape sticks...and they will because the tape is super sticky!


 (This is where super sharp scissors come in handy!) Trim the tape close to the edges
 of the clothespins and wallah!  Super cute clothespins!


I just love making these little things!  I use them in my office to hold loose memos, notes, and 
miscellaneous reminders.  


Easy enough, right?  Now go make lots! =)

Happy Crafting!


Sunday, March 17, 2013

Not Really Spring Cleaning...

We've had some pretty nice springy weather here in San Diego the past few days.  The weather has prompted me to start my spring cleaning....but I didn't get too far with that this weekend.  Instead, I played around with stuff for my shop, because well, that's more fun to me than cleaning!

I love seeing how ladies put little accoutrements in their hair--wouldn't these be cute to put in yours? =)


Or how about adding that special little something to those Easter baskets for the little ones--decorate an Easter egg or two with some fabric tape and you've got an instant shabby chic egg!


Spring is such a beautiful time of renewal--I'm excited for Easter.  Are you?!

Happy Crafting!

Wednesday, February 20, 2013

Pinwheels & Flowers ♥


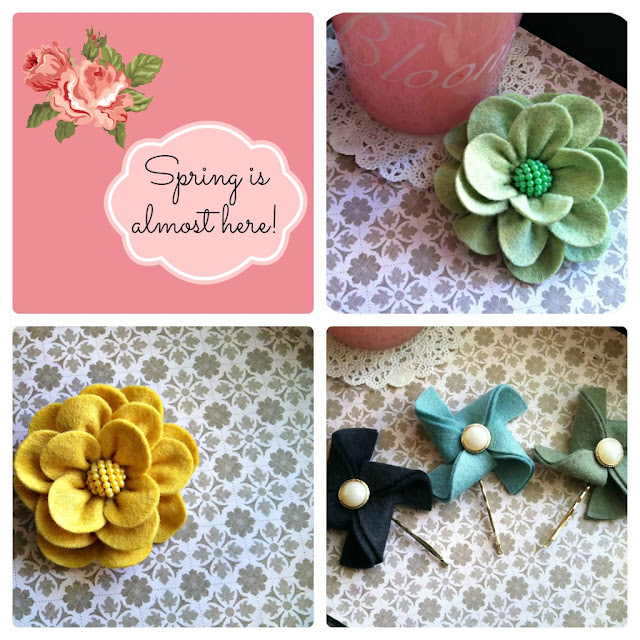
 Here in Southern California, it can be hard to tell when a "season" has arrived.  The weather is pretty consistent throughout the year and our "cold snaps" last about a week at a time (definitely unlike what our East Coast friends have been experiencing lately!).  I do know, however, that spring is upon us in a short month and I'm looking forward to all the pretty florals that will surely flood our senses.  To get a head start, please check out my new "spring inspired" hair accessories--guaranteed to get you looking forward to spring fun!

Happy Crafting!

Tuesday, February 12, 2013

Mini Crochet Flowers: How-To in Pics


 Crocheting flowers is one of my favorite crafts to make.  Use them to make little hair clips, adorn packages, or  embellish other paper crafts.  They're very versatile!  Here's a quick way to make them:

Supplies:
// medium weight yarn (I used a wool blend)
// H size hook (using a smaller hook will yield a smaller and tighter flower)
// fabric tac glue or embroidery thread & needle
// scissors and various embellishments (optional)
(DC=double chain; SL ST=slip stitch; CH=chain)

(note: this pattern makes a flower about 1.25" in diameter)


{Dont' forget to fasten off your yarn when you get to the end!}


{Instead of using glue in this step, you can roll up the flower and then use the embroidery thread to stitch through the petals to secure them in place.}


Embellish these with little white pearls, beads, or leave them as is.  They're really cute just as they are and are handy to have around when you want to add a "little something" to your craft project.
  I used them to embellish mason jar gift tags--check them out in my shop...and all the other pretty lovelies


Happy Crafting!


Tuesday, January 29, 2013

Pretty Fabric Tape How-To


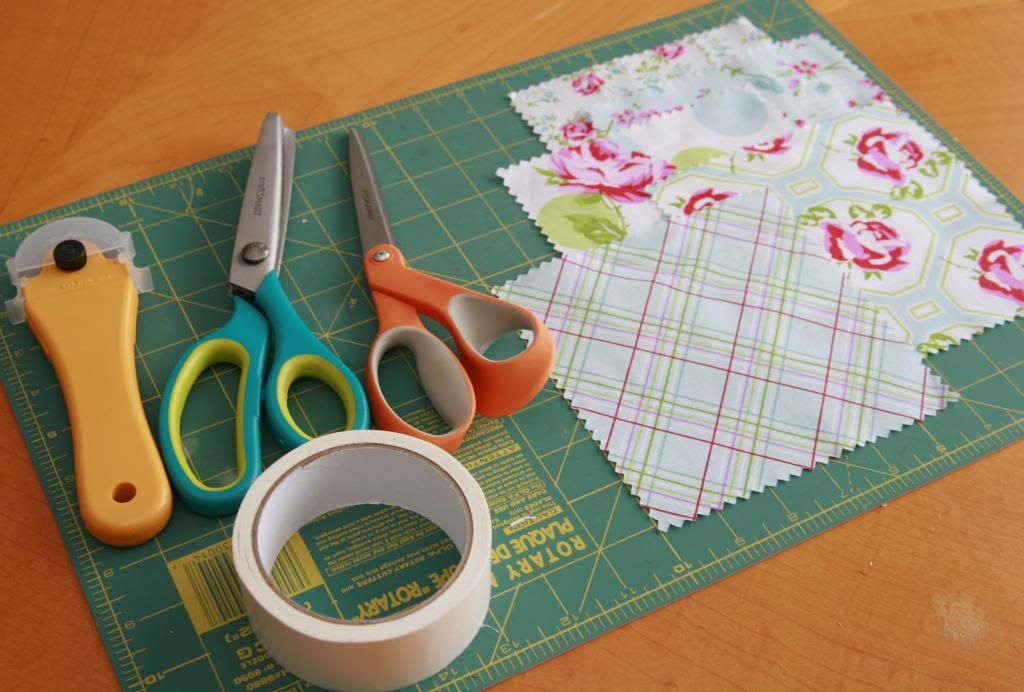
When I purchased my first roll of washi tape, I thought it was the best thing to come to cute packaging and wrapping....and then I stumbled across fabric tape.  So amazingly cute and easy to make!  Plus, it's probably cheaper than washi tape and you can customize your tape through your choice of fabric.  It's a win for me.  Here's how I make it:

Supplies:
♥  pinking shears, scissors, rotary cutter
♥  double-sided carpet tape (I used the ACE Hardware brand)
♥  assorted scrap fabric
♥  cutting mat


 1 ♥ cut several pieces of the carpet tape into 2-3 inch strips.  Lay the sticky side on the fabric smoothing out any wrinkles along the way.  Tip: Use a bone folder to really smooth out any wrinkles!  Using the rotary cutter, trim the excess fabric around each of the strips. 


 2 ♥ cut the pieces to desired size and use the pinking shears to add a decorative trim to the tape.  Woot!  You're done!


Super easy, right?  I think the roll of double sided carpet tape cost about $4.00.  Compare that to one roll of washi tape--not too bad!  Also, rather than making little strips, you can make longer pieces for gift wrapping and other projects where you might need more than a piece--also, available in my shop!  =)


Use your "custom" tape for all sorts of projects from making your own cupcake toppers to embellishing clothespins...the possibilities are endless!

♥  Happy Crafting! ♥